Transforming Vs The Viewbox Control
One of the highlights of the grid control if you recall, was the ability precisely scale elements inside of a grid by scaling the grid itself. We didn’t explore scaling canvases yet though. This is because the process is a bit different, and it gives us a chance to explore another control that is new to Expression Blend 3.
Transforming a Canvas
Choose File > Open Project/Solution and locate the folder in the module03_assets folder named TransformingVsTheViewboxControl and open it. Double-click on the Expression blend file named TransformingVsTheViewboxControl to open the solution. Note: If you do not initially see the Design view of a project, you can click on the Projects tab and double-click on MainPage.xaml.
This project contains two identical layout elements, one of which is a canvas and one of which is a viewbox.
Select the Canvas control in the Objects and Timeline panel.
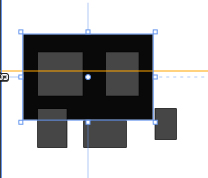
In the Design view, use the bottom left-hand corner of the canvas to resize it like you did with the grid control earlier. Notice the somewhat surprising result. Instead of resizing the contents, this will only resize the canvas itself.
The canvas control does not resize child elements
With the canvas element still selected, open up the Transform section of the Properties panel. Select the scale tab. Type 5 into the X and Y fields. The canvas plus the rectangles inside are now five times as big as they were.
Click Edit > Undo Scale Change Y, and Edit > Scale Change X to reset the canvas size. In fact, this is the only way to scale a canvas element in this fashion. The Transform panel can be used to skew, translate, rotate and even adjust elements on a 3D plane.
It’s important to note that scaling elements produces a display translation. The elements are not actually resized, but are displayed at a percentage of their original values as specified by the RenderTransform XAML element that gets added behind the scenes.
The Viewbox Control
The viewbox control is a new addition to Silverlight 3 projects from the well-established stable of WPF controls. It works a little bit like a canvas, but in fact, it can be combined with a grid to give you the ability to scale child elements like you would with the transform panel, without actually applying a transform.
Select the Viewbox control in the Objects and Timeline panel.
Using the bottom-right hand corner, resize the element in the design view. This result may be a bit more like what you expected to get by resizing the canvas earlier.
You may also notice that the child element, in this case a grid with a number of rectangles inside will be scaled proportionally, unlike using the transform panel with a canvas.
Self Study
Create a user interface using the controls mentioned in this chapter. Start with a grid and add rows for a header, navigation section, and content section. Use the Stack Panel control for the navigation section, a canvas for the header, and perhaps a nested grid within the content section.