Creating a Grid Control
Adding a grid control is similar to adding a canvas control, but with the added ability to draw columns and rows. Now that you’ve seen how to adjust a pre-existing grid, you’ll explore creating your own.
Select the Grid tool from the Tools panel.
To make sure you’re nesting a grid inside the LayoutRoot container, select LayoutRoot in the Objects and Timeline panel. This helps you avoid accidentally adding a grid inside another layout container.
Click and draw a grid in the right column.
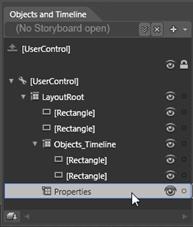
Double-click the name Grid in the Objects and Timeline panel and rename the new grid Properties.
Create a new grid named Properties.
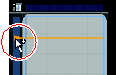
With the Properties grid still selected, add three rows by clicking two times in the blue area to the left of the grid.
Adding a new row to the Properties grid
If you need to adjust the rows, click and drag the rows in the same blue strip that you used to add new rows. If you need to remove rows, simply double-click them.
Make sure that the Properties grid is selected (by clicking it) in the Objects and Timeline panel.
Select the Rectangle tool in the Tools panel, then click and drag a rectangle object in each one of the rows. Note that since this solution was using rounded corners, your rectangles may take on that property. If you prefer, you can remove the rounded corners by changing the value in the RadiusX and RadiusY textboxes in the Appearance panel of the Properties panel. For this example, rounded corners were left on.
Switch back to the Selection tool and lock the top row to duplicate the effects that you achieved in the last exercise, and again, make sure the Properties grid is selected in the Objects and Timeline panel.
Now, click and drag the lower-right handle of the Properties grid. Notice that while the bottom two rectangles re-size, the top rectangle element remains fixed in size.
Of course, the benefit of using a grid control is that you can control the resize of certain elements in your solution. This offers users the opportunity to resize some an application’s size, yet not lose important controls in that application.
You are done with this file, you can choose File > Close All Documents. When the Expression Blend dialog box appears, press Don’t Save.