Modifying a Component
The true power of components is the ability to modify them after they have been applied to a page. This speeds up workflow and allows you to easily experiment with your layout.
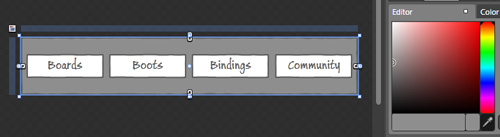
In the SketchFlow Map panel, double-click the navbar component to open this screen.
Click off the screen to ensure that nothing is selected, then click the background. If you do not see the Properties panel, choose Window > Properties.
Within the Properties panel, locate the color editor and choose a middle gray to change the background color of the navbar.
Change the background to gray.
In the SketchFlow Map panel, double-click Boards and notice that the navbar has been updated. To rebuild the page view and clear the exclamation point choose Project > Rebuild Project.
Creating a LiveChat Window Component
A navigation screen can also be completely converted to a Component screen (and vice-versa). You’ll now convert a LiveChat Navigation Screen into a component.
From the SketchFlow Map panel, double-click the LiveChat screen to open it. There is a LiveChat window that you would like to use on your various screens, so you’ll now convert it to a component.
In the Objects and Timeline panel click on the object labeled [Canvas].
This ensures that you are selecting the container that holds all the various elements of the Live Chat window.
Right-click the Live Chat object and choose Make Into Component Screen. Rename the component LiveChat. Also click on the checkbox labeled “Leave original content as is and create duplicates as necessary”. Then click OK.
Click and drag the LiveChat component onto the ReviewCart page. From the SketchFlow Map panel double-click this page to see the component added.
By choosing this option you split off a new Component but leave the original screen intact.
Adding and Removing Components
In addition to converting pre-existing elements into components, you can also create them from scratch.
Right-click within any empty area of the SketchFlow Map and choose Create a Component Screen. A new blank document labeled Screen 1 appears.
Right-click this new component and choose Make into Navigation Screen and you will see it toggle back to blue.
Right-click this screen and choose Remove. You can always remove a screen with this action.