Working with the SketchFlow Animation Panel
Adding frames to create animation
Modifying the animations timing
Prototyping with SketchFlow: Module 8
Working with SketchFlow Animation
By creating a storyboard in the SketchFlow project, you can simulate user interaction. In this module, you find out how to create a storyboard that simulates interaction that occurs when a user chooses to purchase an item in the boots screen.
Opening an Existing Project
To get started, you will open an existing project.
Launch Expression Blend 3 and choose File > Open Project/Solution and browse to the module08_guide folder. Open the folder and then open the snowboard_online folder contained within.
Click the Expression Blend file named snowboard_online and open it in Expression Blend 3.
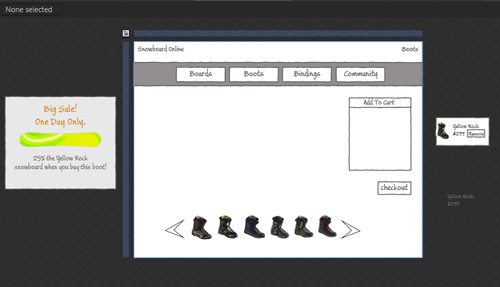
In the SketchFlow Map panel, double-click the Boots screen to open it.
Preparing the Artboard for SketchFlow Animation
You will be creating an animation on the Boots screen which simulates the following behavior: A user clicks on a single boot from a group of boots and drags it into the Add to Cart section. Additionally, when the user first hovers over the boot a price will fade up and then disappear as it is dragged. Also, when the boot is added to the cart, it is replaced with a price and simultaneously a Sale window will animate in from the left-hand side of the screen.
Double-click the Boots screen if it is not currently open.
Double-click the value in the Zoom text field, in the lower-left of the workspace, and type 67 to change the zoom level to 67%.
Enter a value in the Zoom textfield.
The first step you will do is to set up your initial screen with two elements; the boot price that appears when the user hovers over the boot, and the boot price after the boot is added to the cart. After you position these elements, you will reduce their opacity to 0%, making them invisible.
The initial screen.
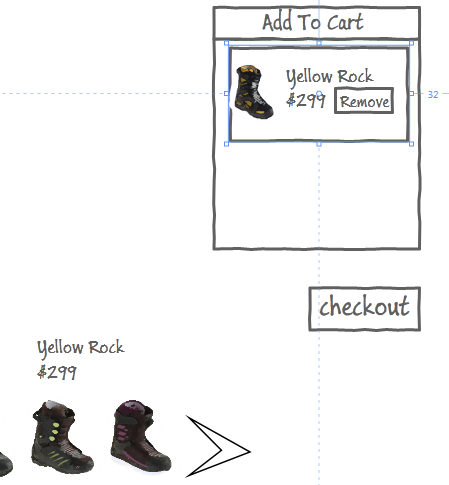
Click and drag the textblock labeled Yellow Rock 9 and place it over the second boot from the right (with the yellow dots).
Open the Objects and Timeline panel if necessary and locate the yellow_rock_in_cart object and then click it once to select it. Then click and drag the selected boot and price into the Add to Cart section.
Click and drag the boot into the Add to Cart section.
With this object still selected, locate the Opacity property in the Appearance section of the Properties panel and change the value from 100% to 0, then press the Return key.
Click the Yellow Rock price that you placed over the boot and repeat this step, changing the Opacity value to 0.
If the SketchFlow Animation panel is not currently open, choose Window > SketchFlow Animation.