Using the Back and Forward Buttons
In addition to targeting specific pages with the “Navigate To” command, you can also specify a more generic command with Forward and Back buttons.
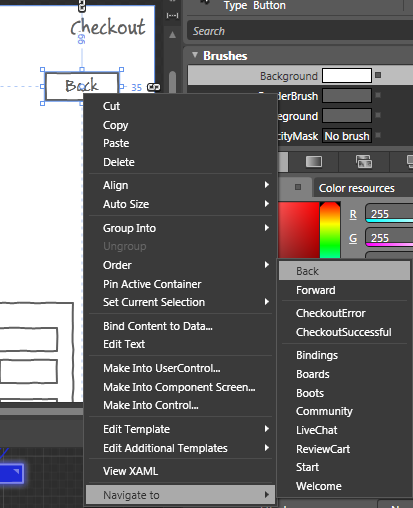
In the SketchFlow Map panel, double-click the checkout screen to open it.
Click once on the Back button to select it, then right-click, and from the resulting menu, choose Navigate To. From the submenu that appears, choose Back.
Press F5 to build the application, when the SketchFlow player appears, click on the Boards page. Click the Checkout button (we have already enabled this button to go to the Checkout page).
In the Checkout screen, click the Back button and you will navigate back to the Boards page. Using the “Back” and “Forward” commands allow you to create a more flexible navigation similar to the Back and Forward buttons in a web browser.
Close the SketchFlow player.
Removing Navigation Behavior From a Button
The not-so-hidden secret regarding the Navigate To commands are that they are actually a new feature of Blend 3 called Behaviors.
For the most part, the fact that these are behaviors is not particularly relevant until it comes time to remove one completely.
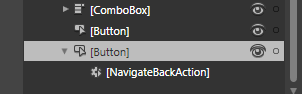
Click the Back button in the checkout page.
In the Objects and Timeline panel, locate the highlighted button. Click the arrow to the left to expand it. Nested within will be the [NavigateBackAction] behavior.
Click this behavior and press the Delete key to remove it.