Viewing editable regions
To view the editable regions in a .dwt file when the regions are not selected, make sure Visual Aids are turned on. From the View menu, click Visual Aids, then click Show. After Visual Aids are turned on, from the View menu, click Visual Aids, then click Template Region Labels.
Renaming an editable region in a Dynamic Web Template
Select the editable region that you want to rename. In Design view, right-click the Dynamic Web Template, then click Manage Editable Regions. In the Editable Regions dialog box, from the Region name box, type the new name, then click Rename.
To remove an editable region from a Dynamic Web Template
Select the editable region that you want to remove. In Design view, right-click the Dynamic Web Template, then click Manage Editable Regions. Make sure that the editable region that you want to remove is selected, then click Remove.
Attaching the template to new pages
You will now generate the additional pages in your site based on this new template
Choose File > New > Create from Dynamic Web Template. In the Attach Dynamic Web Template window, click the default document representing your .dwt file, then click Open.
A new document labeled Untitled_1.html appears. This file is based off your template. A window appears noting that files have been updated. Because a link to an external file (the silverlight document) has been created, Expression Web needs to keep track of these links. Click the Close button.
Place your cursor over the Silverlight content and note that an editing not permitted icon appears instead of your cursor. This is because this area is defined as non-editable. This is one of the benefits of templates; this section is now off-limits to anyone within this file.
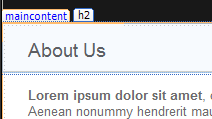
Click inside the Heading labeled Welcome! and type About us. You can do this because you defined this area as editable in the last exercise.
Choose file > Save and name this file About.
Choose File > Preview in Browser. Click the About section of the navigation and you will be sent to this page. Click the services navigation and you will receive an error because this page does not exist yet. Close your browser, you will now have to generate the additional section pages for the site
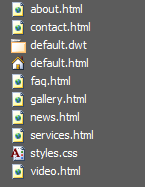
Repeat steps 1-5 and generate new pages with the following names. The file names must be precise because the Silverlight navigation will link to these documents: services.html
news.html
faq.html
gallery.html
video.html
contact.html
When complete, your Folder list should have these html files visible at the root level.